

We have video instructions on using our newest registration system. The video will cover:
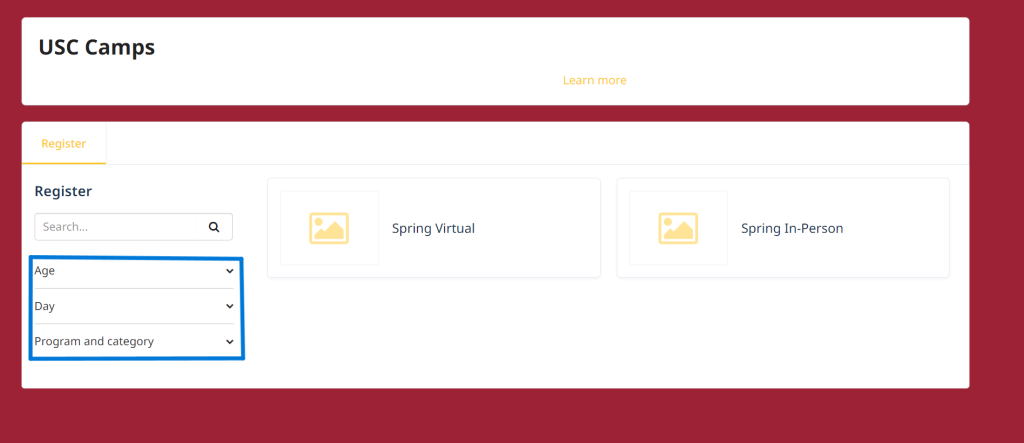
- How to filter programs based on age, date, and program/category
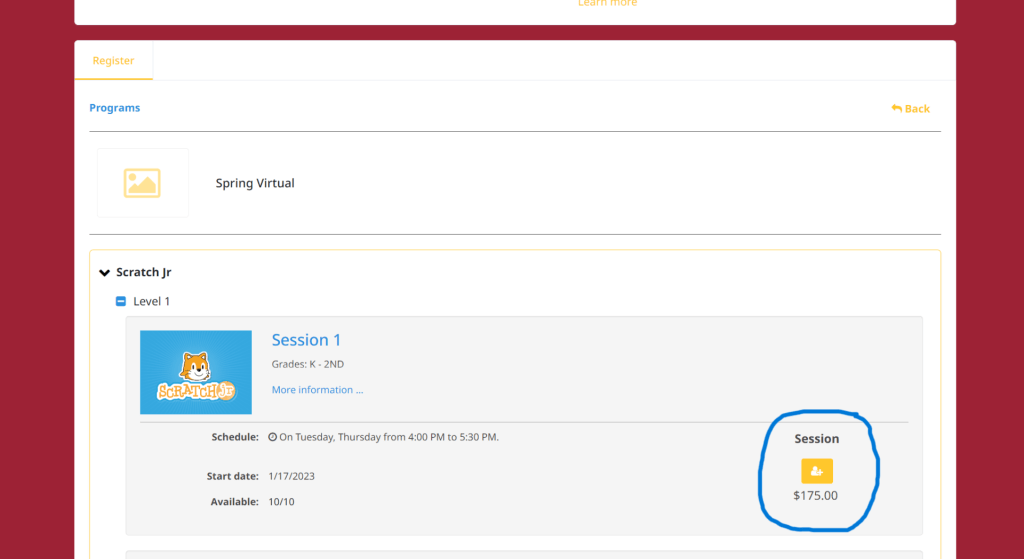
- How to sign up for a course
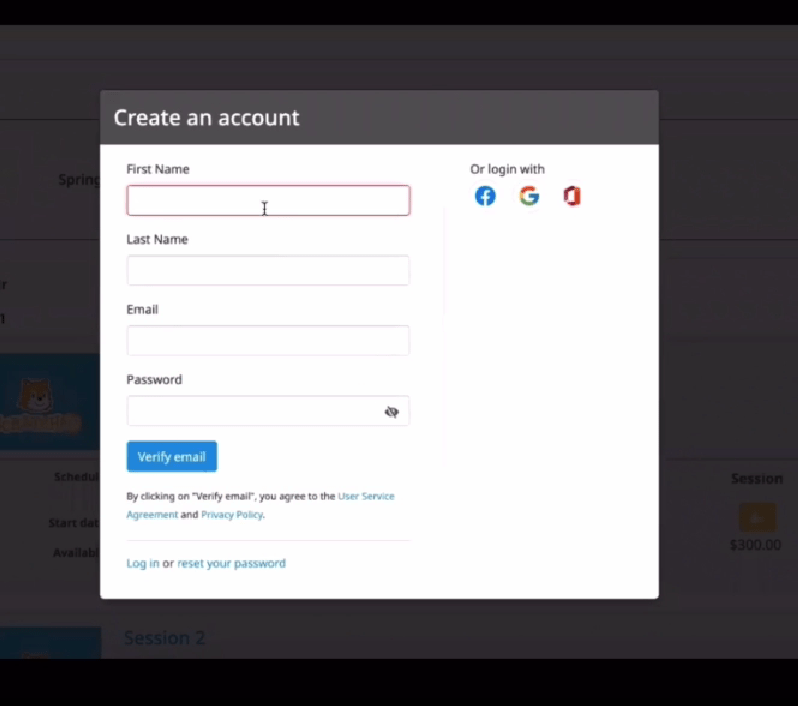
- Creating an account for you and for your student
- How to use the checkout system
We also included step-by-step instructions as well!
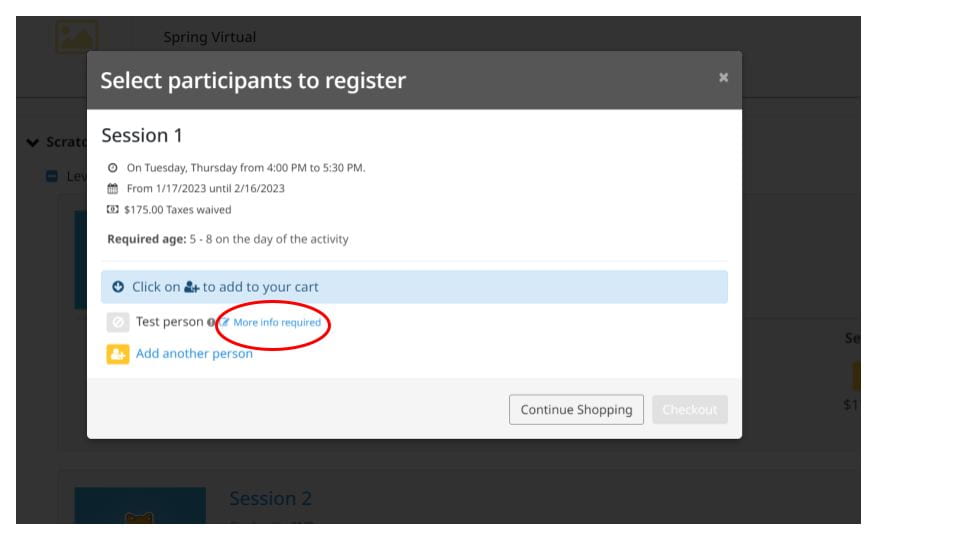
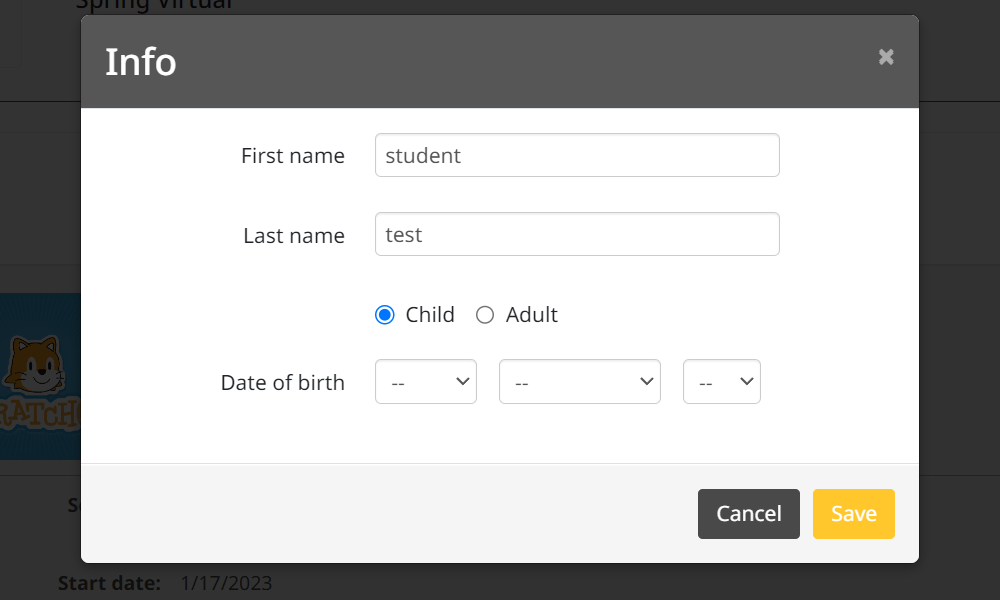
4. Once you have verified your email, you will be asked to consent to sharing profile. Then it would display to register. However, before you begin, click the link "more info required" and fill out the parent's information for the account. Note: The information should be yours and not your students.
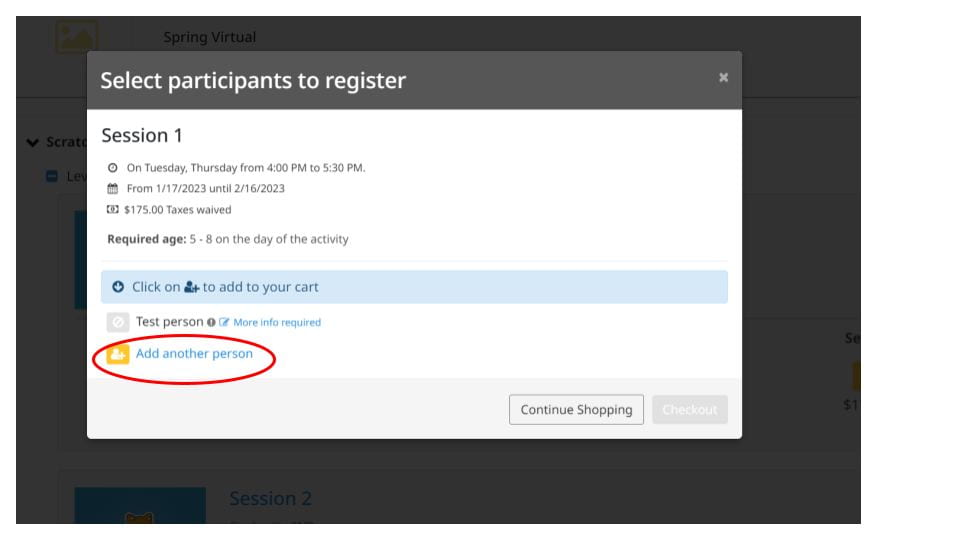
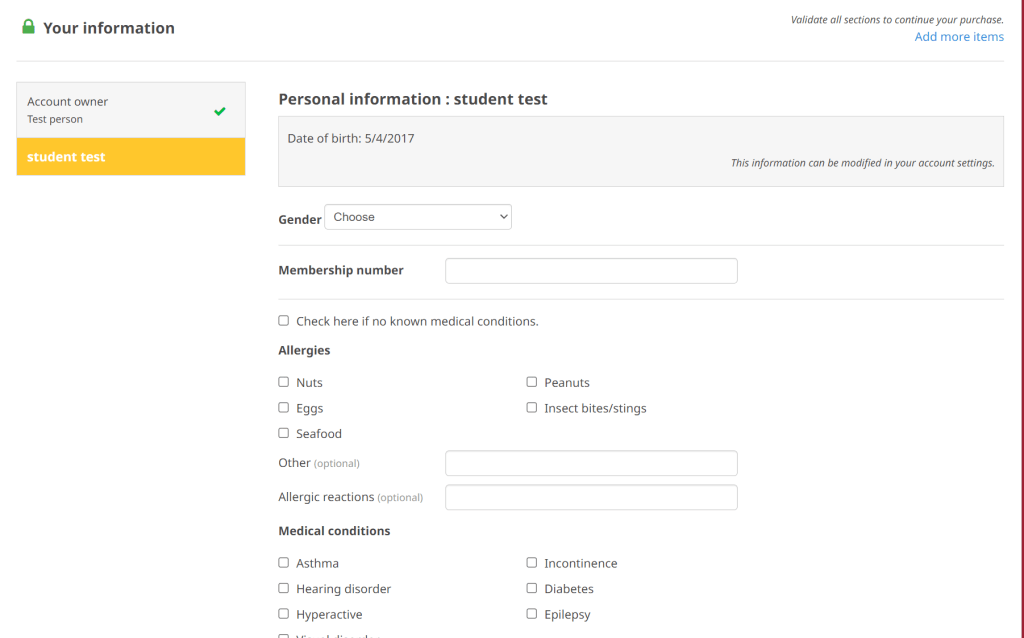
5. After the information is filled out, you can click the yellow button and add the student's information.
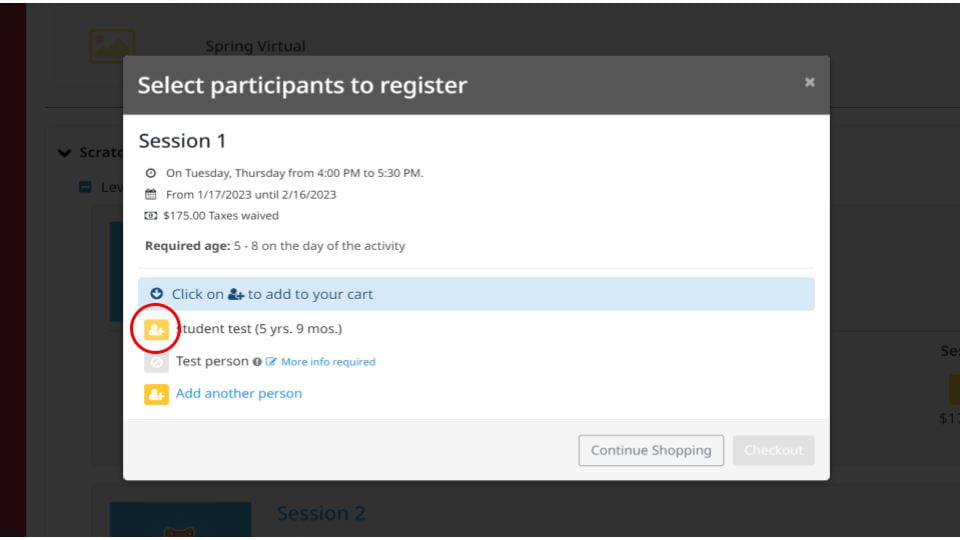
7. After the student's information is filled out, select the yellow button next to the student's name in order to add the course into the cart for your child.
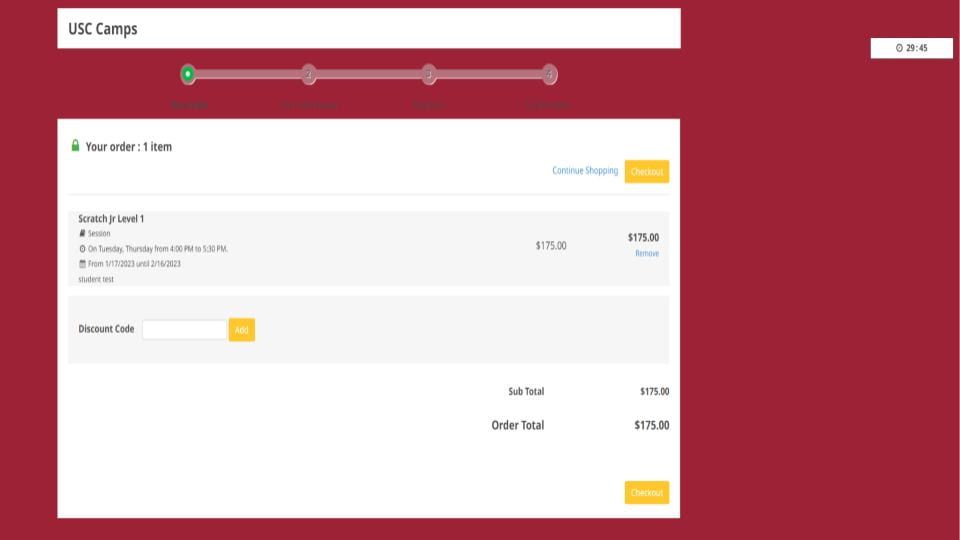
8. A check out button should appear and once you click the button, you have 30 minutes to complete your order. In the page, you can add your scholarship code and see your order total.
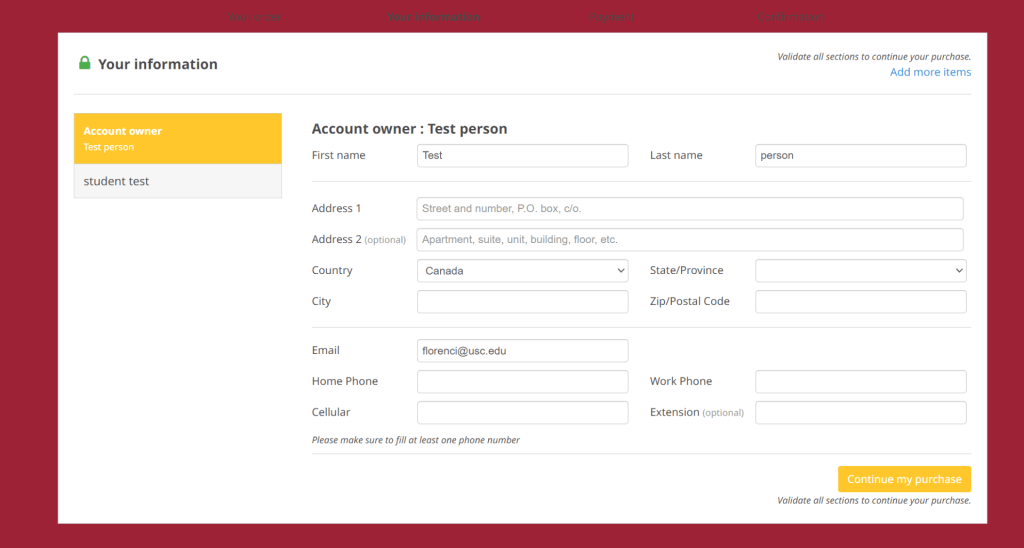
9. When you click the checkout button, you are then sent to a page where you will need to fill your information such as address and phone number.
10. After clicking "continue to purchase", you will then be sent to fill out your student's information. Then you can checkout and provide your payment information.